
Cloud computing services are being used in the IT industry for a long time now. There are several reasons behind the success of cloud computing including, easy to get started, easy to create resources, easy to set up high-performing scalable applications, etc. But, still, the security and infrastructure choices are the two main issues that cloud solution providers encounter. Microsoft Azure also provides several ways to ensure the security of your cloud infrastructures, but still, there are many areas to manage. When it comes to the infrastructure, customers have to choose which services, platforms, languages, and integrations to use, and these are not easy decisions to take. This article will discuss one way of selecting a secure infrastructure, securing an Azure Function with an App Service Environment (ASE).
How does Azure Functions hosting work compared to the App Service Environment?
Imagine you are making a publicly available meme generator. To keep the costs low, you plan to use Azure Functions for the image processing component of your solution. To do that, you have to build a Function App, write code, put that into a function within your Function App, and maybe allow users to access this solution through a single-page application. It provides a low-cost serverless solution that frees you from managing the underlying infrastructure. Microsoft manages a large number of infrastructures across the global data centers and shares that out across different customers. This approach might be suitable for a meme generator. But what happens if you need to process private health data or some top-secret data?
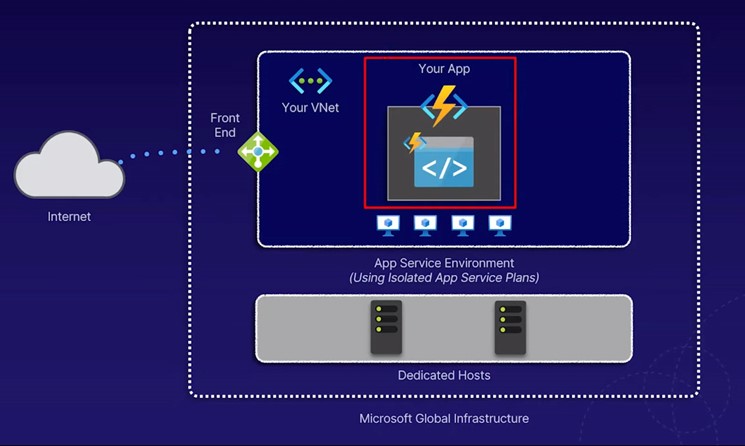
When deploying the function, you have to choose from hosting plans such as Consumption Plan, Premium Plan, or App Service Plan. Now, depending on the chosen plan, it creates resources that your application can run, and Microsoft manages all of that for you. Let’s try to understand that process. Your app has to run on some computer, and then it requires some actual execution environment to run and needs inbound and outbound connectivity. Azure Functions Hosting is a multi-tenant service, and there may be other customers who work on the same infrastructure as you. Though this is kept secure and separate from other customers, you are still sharing the infrastructure. Even underlying hypervisors that these services run on share across different services to different customers. But, you cannot build solutions in a multi-tenant host environment for scenarios such as government contracts, defense contracts, or some compliance obligations that you have to adhere to. It is intolerable if you couldn’t use the Azure Functions or Web App type services because of these compliance requirements. These services have a massive impact on developers, and that’s why Microsoft has introduced Azure App Service Environment. If you need to use a single-tenant service to host your solution, that’s the scenario where you can use Azure App Service Environment instead of that.
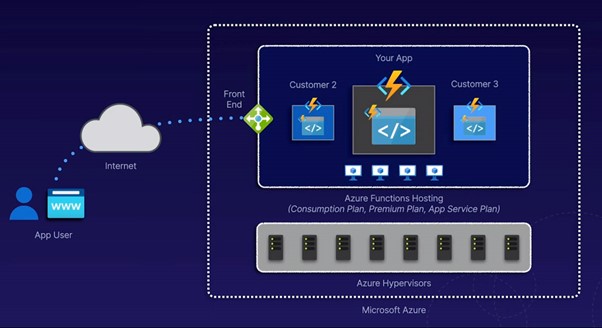
Azure App Service Environment still provides the same type of functionality with Azure Functions or Web Apps but only for your solution. Therefore, it acts as a single-tenant service. You deploy an Azure App Service Environment to your virtual network, and you can change the type of accessibility to internal or external. App Service Environment (ASE) v3 provides an easier way to deploy, and you can even use your dedicated hypervisors through dedicated hosts.
Configuring an Azure App Service Environment v3
This is the Azure Portal, and you can deploy your App Service Environment here.
Step 1 – Click on the Create a resource and search for App Service Environment v3.
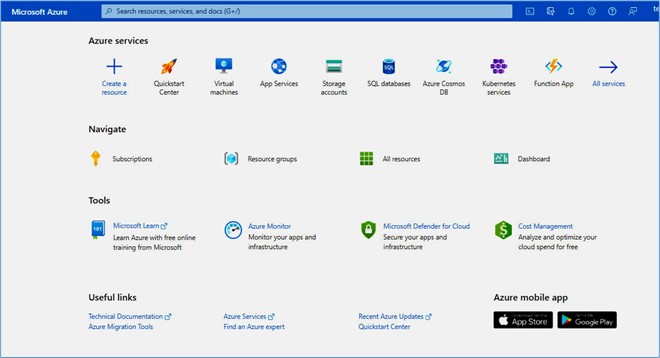
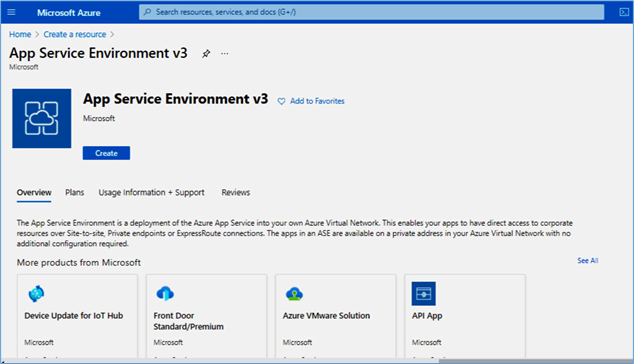
Step 2 - Click the Create button.
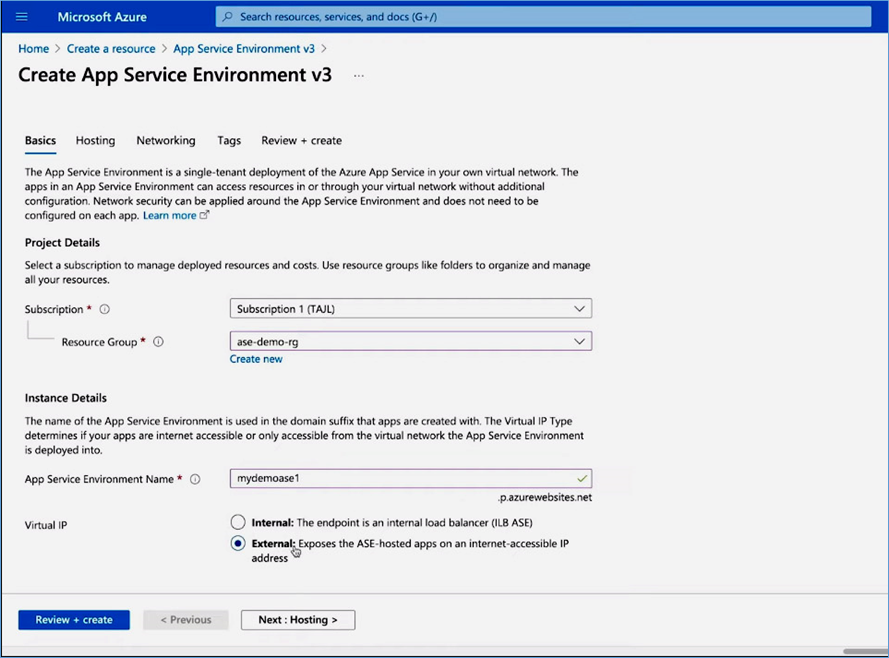
Step 3 - Under Project Details, select an existing resource group or create a new resource group. (ase.demo.rg)
Step 4 - Enter a name for the App Service Environment. (mydemoase1)
Step 5 - Select the Virtual IP type for your App Service Environment.
If your solution is a private and fully isolated one, it only requires the internal access and choose Internal. If you choose the External, then your apps can be access from internet.
Step 6 – Click the Next: Hosting button.
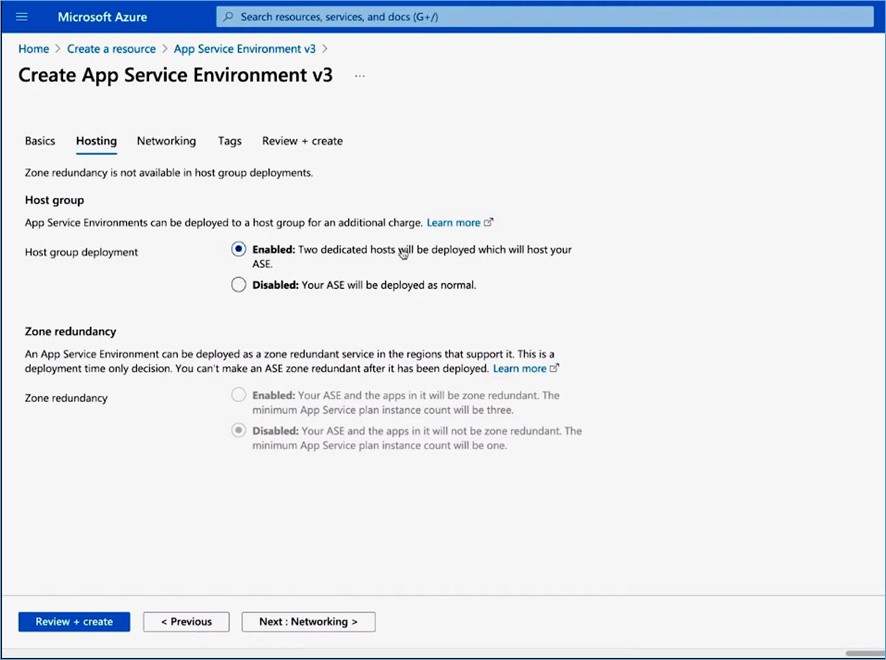
Step 7 – Select the Host group.
If you want to have a dedicated hypervisor layout for your benefit, you can choose the Enabled option to have a dedicated host deployment. That’s where you will get two dedicated hosts deployed for your App Service Environment. But, if you select that option, you must exclude some zone redundancy features because the dedicated host group will only deploy to a single zone.
Step 8 – Click the Next: Networking button.
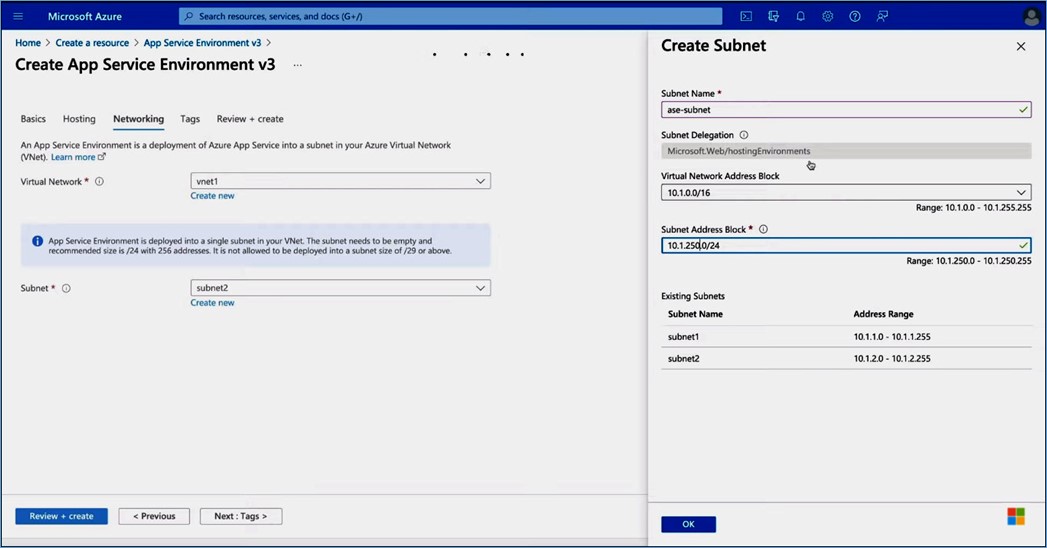
Step 9 – Select a virtual network from your existing virtual network list or create a new one.
Step 10 – Create a new subnet (ase-subnet). Here, you can change the IP address range.
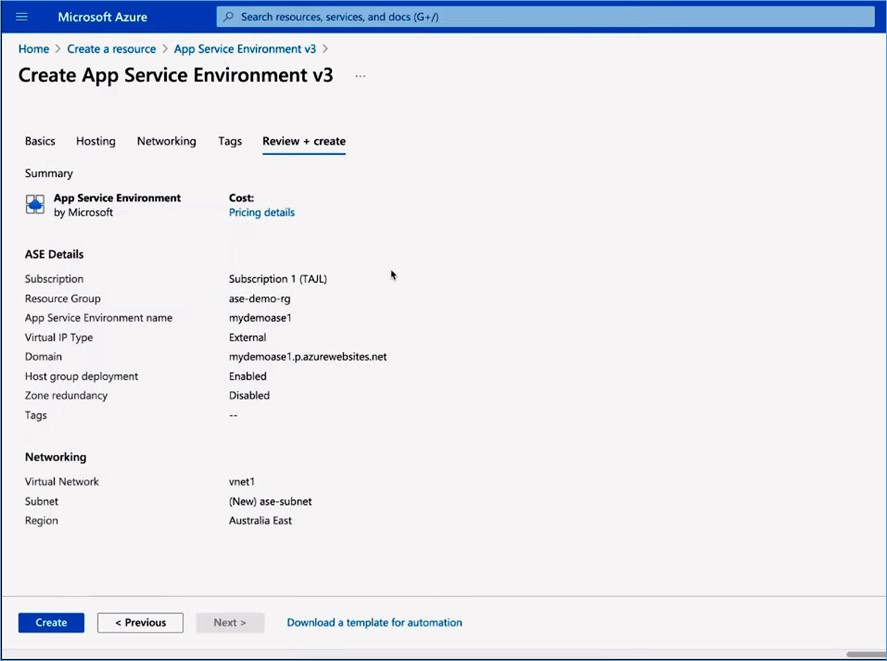
Step 11 – Click the Next: Review + create button.
Now you are ready to deploy your own App Service Environment that only you can use for your own Function Apps, or Web Apps.
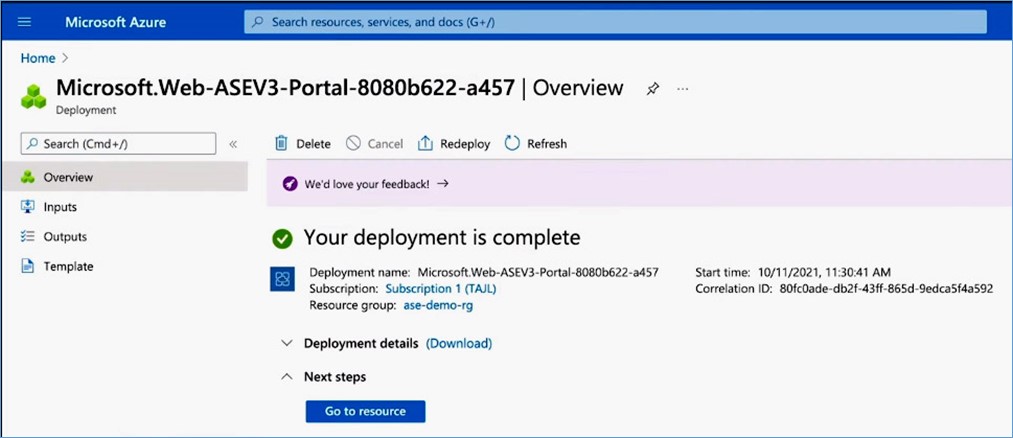
Step 12 – Click the Create button.
Building a simple V4 Azure Function App with .NET 6
To use the App Service Environment you just set up, you need to use an Azure Function. With the App Service Environment infrastructure in place, you can deploy code into it. In this tutorial, we will use the prerequisites Azure Functions Core Tools version 4.x, and .NET 6 SDK. We also need Visual Studio Code with the C# extension and the Azure Functions Extension. Now, you will learn how to build a function and deploy it inside of an App Service Environment. You can do that using Azure Functions that are hosted on App Service Plan, which is hosted inside the App Service Environment. Note that you can run Azure Functions inside an App Service Plan.
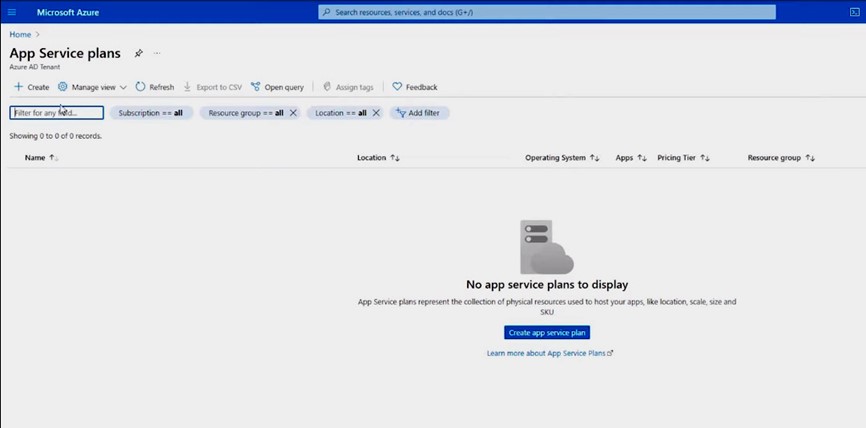
First, you need to create an App Service Plan which will host your Function App.
Create an App Service Plan
Step 1 – Go to Search Bar and search for App Service Plan.
Step 2 – Click the Create button.
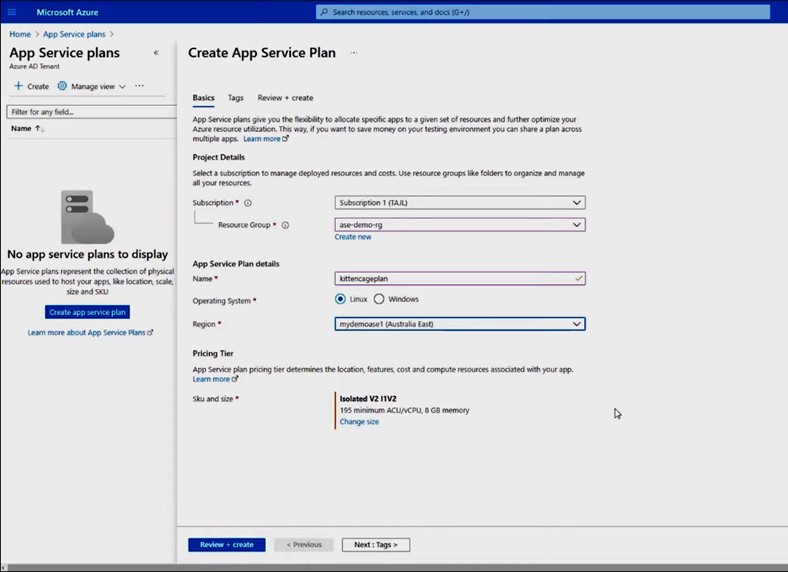
Step 3 - Choose a subscription and resource group. You can use the previously created subscription and resource group here.
Step 4 – Enter a name for your App Service Plan (kittencageplan)
Step 5 – Select the operating system.
Step 6 – Choose a Region.
Usually, you would choose a region from the list that you normally see, like the Central US here. With App Service Environment, you could select the App Service Environment itself as a region because it can be placed the App Service Plan inside of that gated environment. You must use that and not just some random regions. Otherwise, you won’t go inside the App Service Environment.
Step 7 – Click the Review + create button.
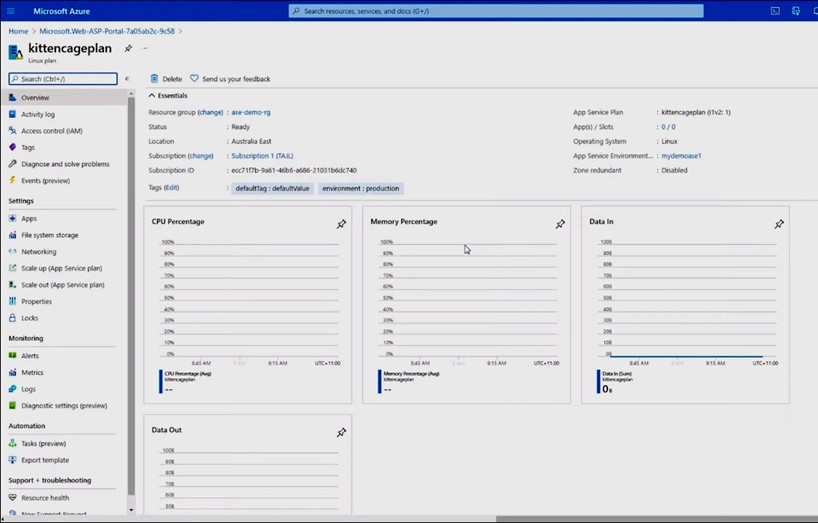
After it's created, you can click on the Go to Resources button and have a look at your Azure App Service Plan. Now, you can use it to create the Azure Function App.
Create an Azure Function App
Step 1 – Go to Search Bar and search for Function App
Step 2 – Click on the Create Function App button to create a Function App inside of the App Service Plan.
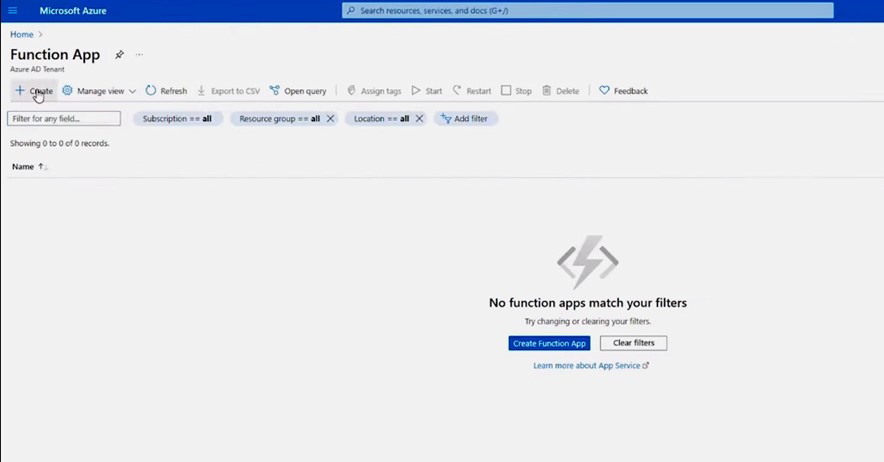
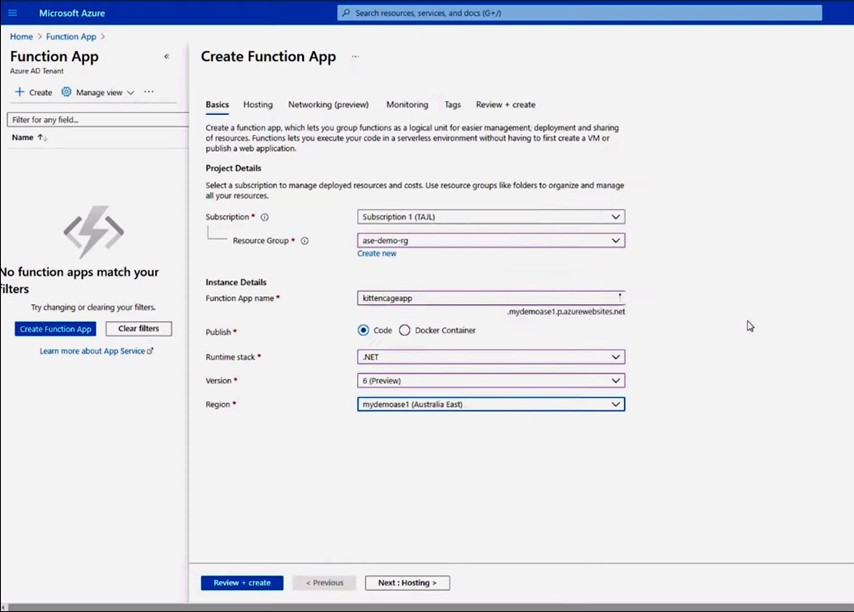
Step 3 - Choose a subscription and resource group. You can use the previously created subscription and resource group here.
Step 4 – Enter a name for your Function App (kittencageapp)
Step 5 – Choose the Runtime stack (.NET)
Step 6 - Choose the Version (.NET 6)
Step 7 – Select the Region
Again, choose the App Service Environment as the region. Then, you can choose the right App Service Plan.
Step 8 – Click the Next: Hosting button.
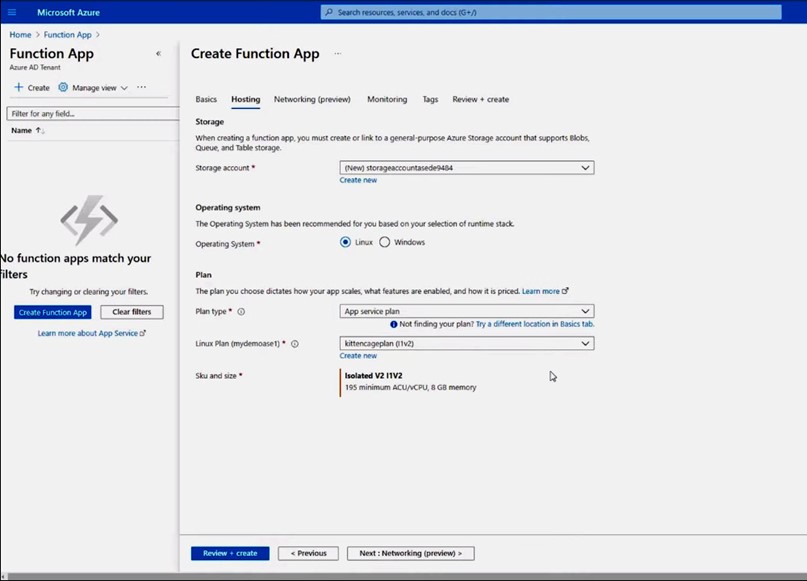
Step 9 – For a Storage account, you can use the default storage and next select the Operating System. It will automatically pre-select your App Service Plan (kittencageplan).
Step 10 – Click the Review + create button. You don’t have to enter networking and monitoring details for now.
Step 11 – Click the Create button
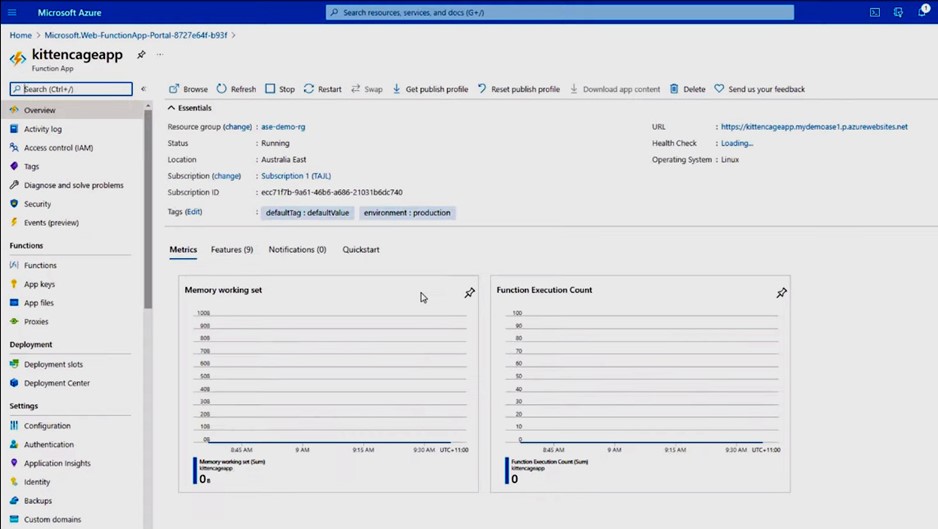
Now, we have created an App Service Plan inside of the App Service Environment and a Function App inside of that App Service Plan.
After the deployment, you can click on the Go to resource button to go inside the Function App. It can be considered as a container for functions. If you want, you could create a function through the portal. But, now we will use Visual Studio Code to create that function.
Create a function through the Visual Studio Code
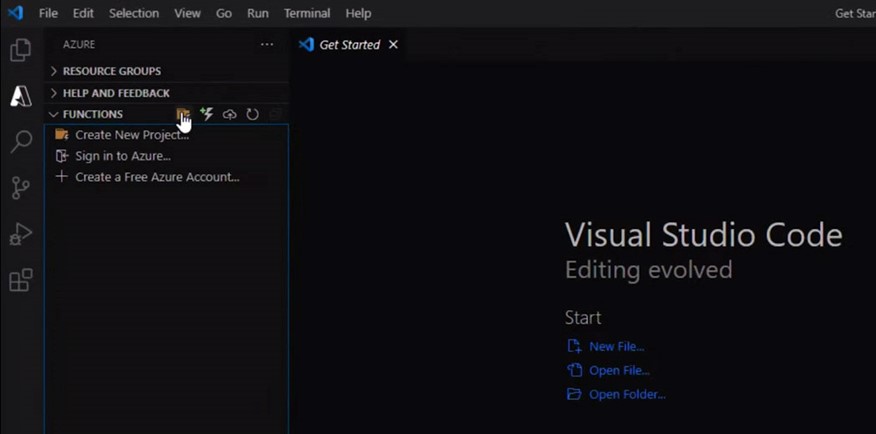
From the Azure menu, click on the Create New Project icon to create a new project (kittenorcage).
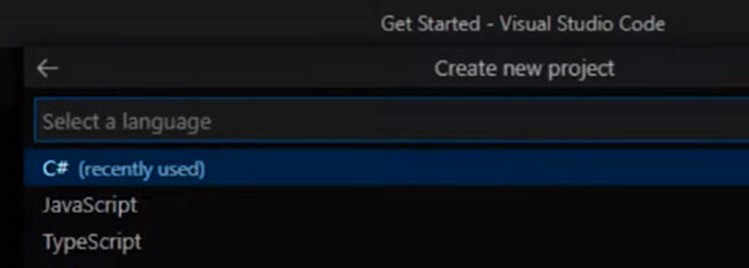
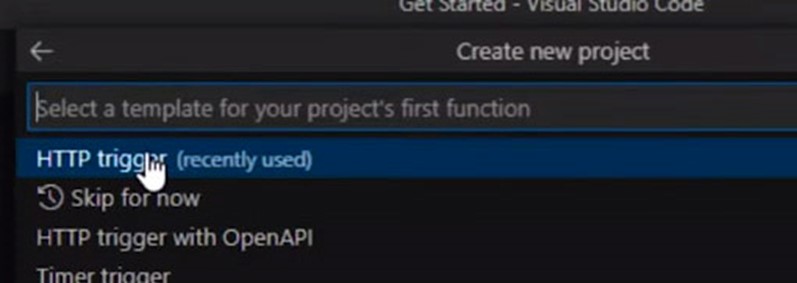
Then, select the language (C#) and select the HTTP trigger as a template for your project’s first function.
Next, provide a function name. (kittencagefunction) and a namespace (MSignite21.kittencage).


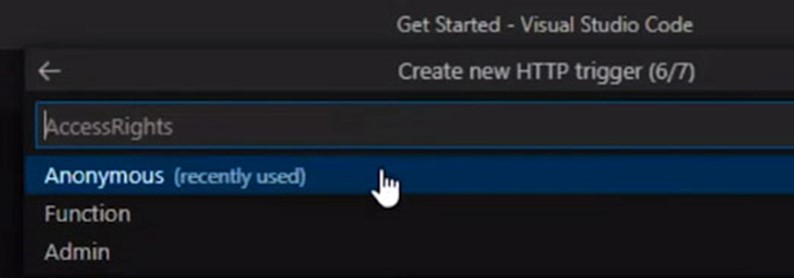
Then, set the access rights to Anonymous, which means you can access this function from outside, or anyone on the internet can connect to this function. Finally, add it to your existing workspace.
Visual Studio Code will create a standard function. But, we don’t use it and will modify the function by adding new code to the kittencagefunction.
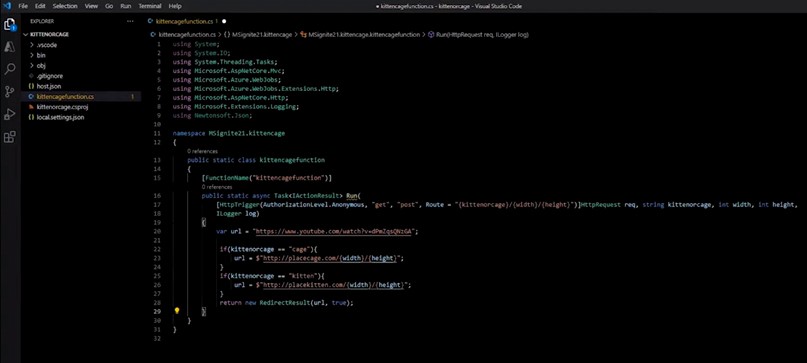
The main component is the Route in the signature of the function, and that’s kittenorcage, width, and height. Those are the ones that determine what to return.
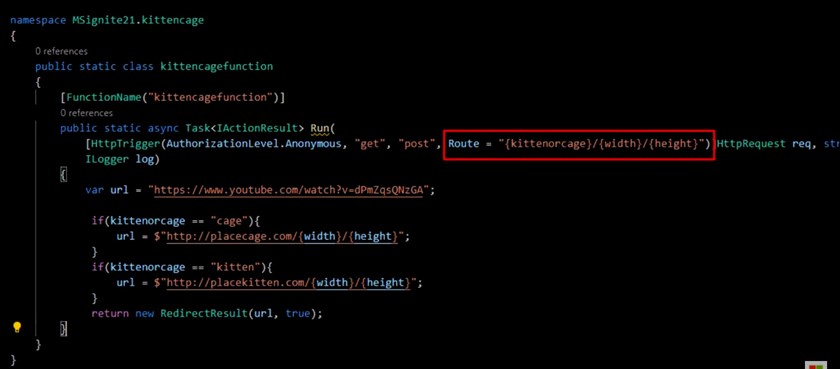
If you type “cage” in the URL or the route, it goes to place cage with width and height. If you try “kitten”, it will go to place kitten with width and height.
Go to Run > Debug or hit F5 to run the function.
If there are no errors, your function will build successfully, and once it did you can run it locally. The previously mentioned prerequisites allow you to run the function locally through Visual Studio Code. It allows you to debug locally rather than having to push it up to Azure every time you want to run it.

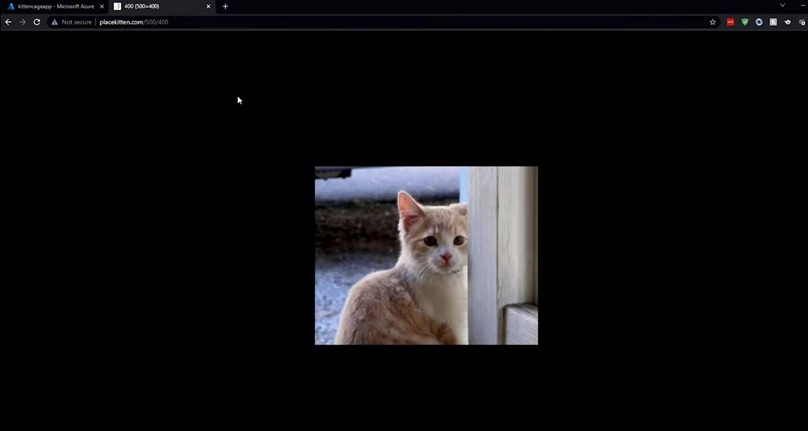
Now your Azure function is running and ready to receive a request. To test that, copy the localhost address, open a new browser tab and paste it there. If you want a kitten size 500 x 400 pixels, add that to the local address. Then, it will redirect to place kitten and show a kitten.
http://localhost:7071/api/kitten/500/400
You can test it for the cage.
http://localhost:7071/api/cage/500/500
Push the function to Azure Function App
Go to Azure Menu > Sign into Azure. On another screen, it will open up a Microsoft account sign-in. Choose your account and sign in. Once you signed in, close that page and go back to the Visual Studio Code. Then, you will sign in to Visual Studio Code through the Azure Extension.
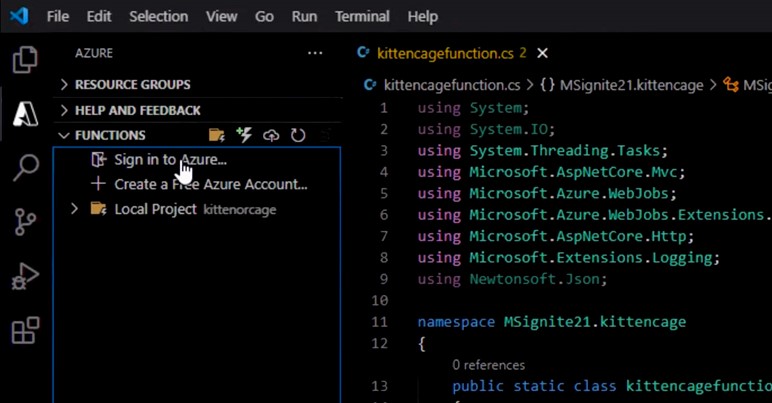
Here, you can see the subscription created earlier and the Function App (kittencageapp). Inside the kittencageapp, you can see various elements of that Function App such as Functions, Application Settings, etc.
Click on Functions and press the upload button. It will deploy the kittencagefunction up to the Function App on Azure. You could create a new one or choose the existing Function App (kittencageapp).
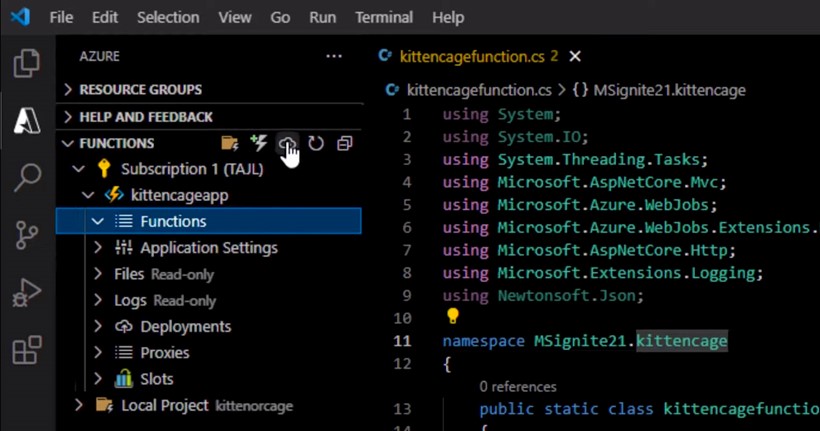
Go back to the Azure Portal and refresh the page to see the function that uploaded from Visual Studio Code.
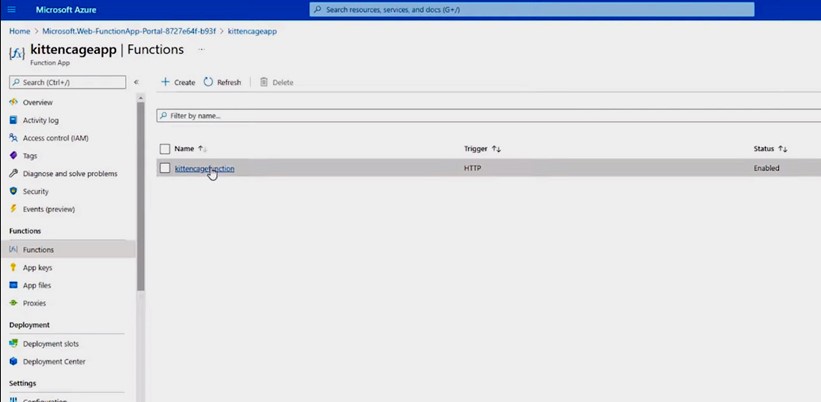
Go inside the kittencagefunction and click on the Get Function Url, copy the URL and paste it on the browser.
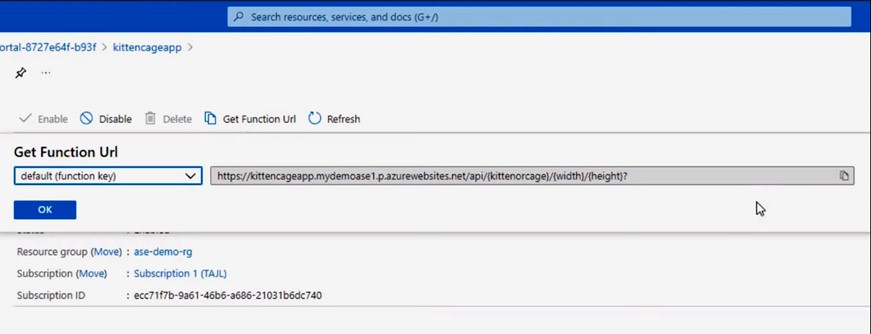
You can change the URL to get a kitten or cage as before.

References:
Microsoft Ignite Sessions


