MSIX is a new type of application packaging technology. Basically, it is a container-based packaging solution for windows applications that do not require installation on a Windows operating system. All the required components are residing in a lightweight application container that is isolated using the filesystem and registry virtualization rather than natively on the operating system.
MSIX app attach is a recently established feature of the Azure virtual desktop solution. It is designed to dynamically attach the MSIX application container to the AVD user session. This will reduce the management overhead of installing applications on the golden image capturing process and simplifying app delivery. Also, it is designed to deliver applications that do not impact or delay user login times. One of the important benefits I see is application segregation, which means in a single host pool, single VM, different types of users can log in, and their applications are not visible to other users.
In this post, I’m discussing the following Implementation tasks
- Generating self-service certificate and installing the certificate on session host VM’s
- Downloading and Installing the MSIX packaging tool
- Capture the MSIX application and expand it to a container
- Configuring central storage to save and place all MSIX applications
- Configuring MSIX App attached from Azure portal
- Publish the MSIX container to the users.
- Test end-user experience and troubleshooting advisory.
Create Self signed certificate
Each MSIX app that you create or capture needs to be digitally signed. In other words, you need to use a certificate for the capture process. There are three options.
- Public SSL certificate
- Enterprise PKI
- Self-sign certificate
MSIX application to work, all the VMs that have access need to be trusted by the certificate. Therefore you need to install the self-sign certificate on all the AVD VMs. In my scenario, I’m using a self-sign certificate however, for production environments, it is advised to use Enterprise PKI or Public SSL certificate.
Generate Self-sign certificate
You can create a self-sign code signing certificate using the below PowerShell command lets. It will export the created certificate to the C:\tools folder.
$cert = New-SelfSignedCertificate `
-CertStoreLocation Cert:\LocalMachine\My `
-DnsName "Kandy" `
-Type CodeSigningCert `
-Subject "MSIXApps" `
-notafter (Get-Date).AddMonths(24) `
-Verbose
$cert
$secPassword = ConvertTo-SecureString -String 'aa' -Force -AsPlainText
$certPath = "Cert:\LocalMachine\My\$($Cert.Thumbprint)"
Export-PfxCertificate -Cert $certPath -FilePath 'C:\tools\MSIX-CodeSigning.pfx' -Password $secPassword
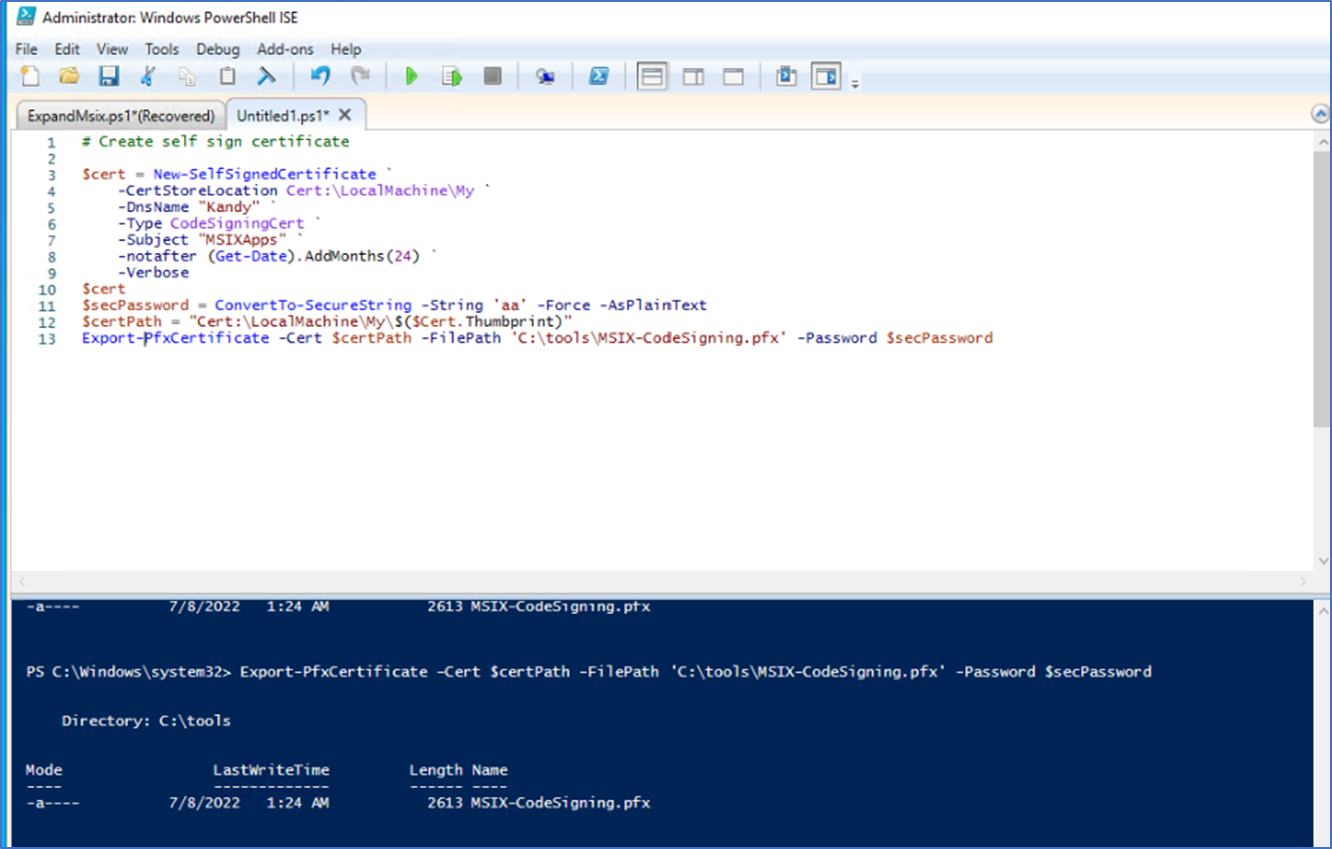
Deliver self-signed certificate on Session host VM’s
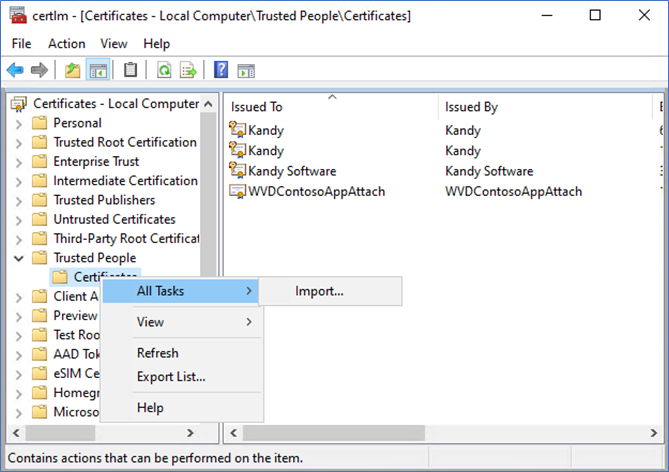
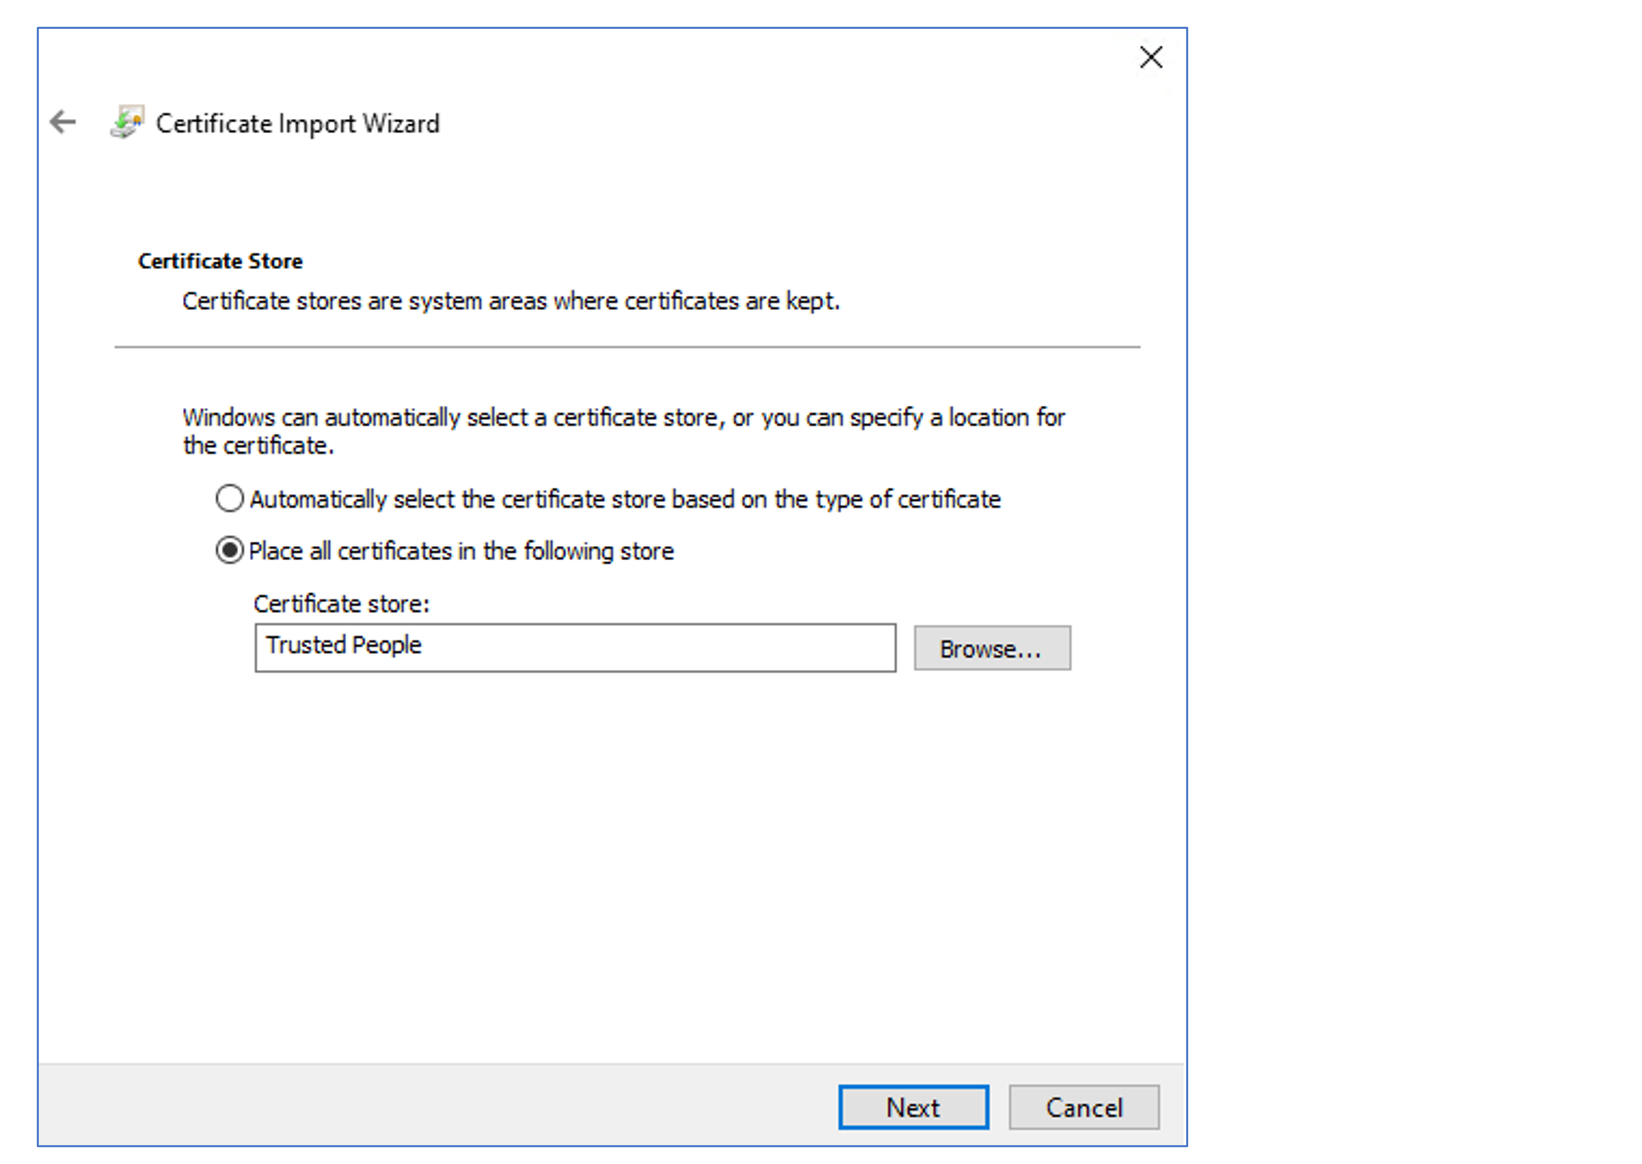
If you are using a self-sign certificate, such as in this article, you need to install the certificate in all the AVD session host VMs. You need to place it in Computer certificates – Trusted people.
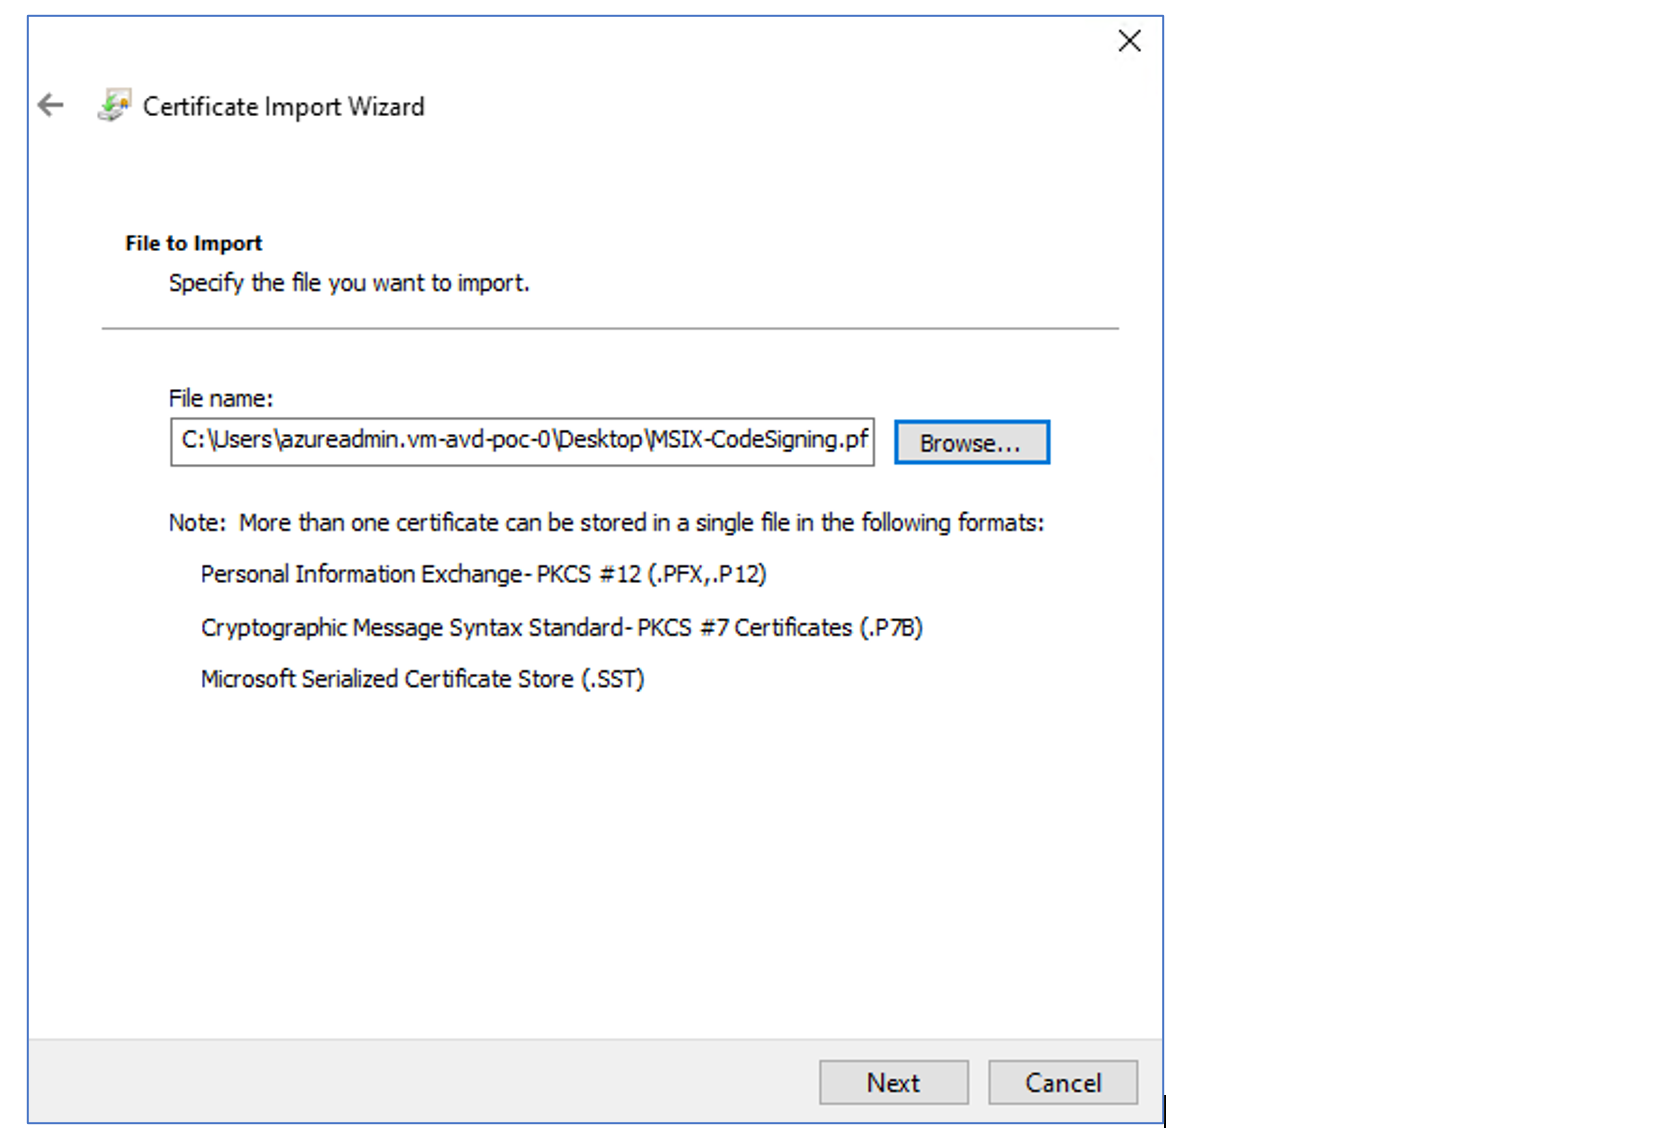
Login to the VM, Open Manage computer certificates, and Import previous created certificates into Trusted people
Install and configure the MSIX packaging tool
MSIX app attach does not support automatic updates for applications. Therefore, you must disable it before installing the MSIX packaging tool.
To disable automatic updates, run the below script. – original post (here)
rem Disable Store auto update:
reg add HKLM\Software\Policies\Microsoft\WindowsStore /v AutoDownload /t REG_DWORD /d 0 /f
Schtasks /Change /Tn "\Microsoft\Windows\WindowsUpdate\Automatic app update" /Disable
Schtasks /Change /Tn "\Microsoft\Windows\WindowsUpdate\Scheduled Start" /Disable
rem Disable Content Delivery auto download apps that they want to promote to users:
reg add HKCU\Software\Microsoft\Windows\CurrentVersion\ContentDeliveryManager /v PreInstalledAppsEnabled /t REG_DWORD /d 0 /f
reg add HKLM\SOFTWARE\Microsoft\Windows\CurrentVersion\ContentDeliveryManager\Debug /v ContentDeliveryAllowedOverride /t REG_DWORD /d 0x2 /f
Next, you need to download the MSIX packaging tool. It is a Microsoft store application. You can download it from the Microsoft store
MSIX Packaging Tool - Microsoft Store Apps

Capture application to an MSIX
I have seen many examples of capturing Notepad++, Chrome, Firefox, and 7zip. Therefore, I thought to capture a video and audio player for this scenario. I’m using a famous video audio player called Gom Player.
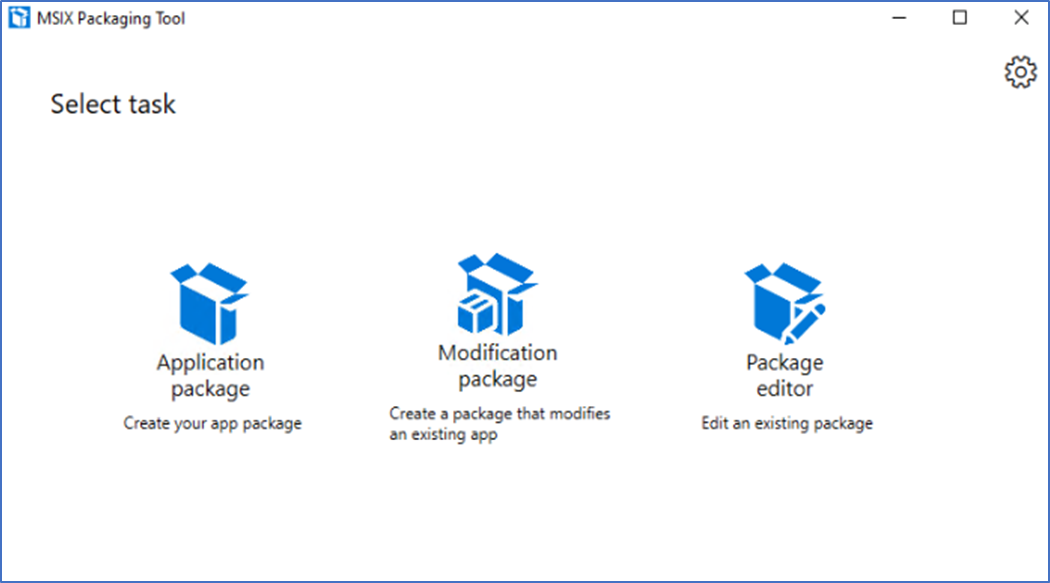
- Open MSIX packaging tool, select Application package
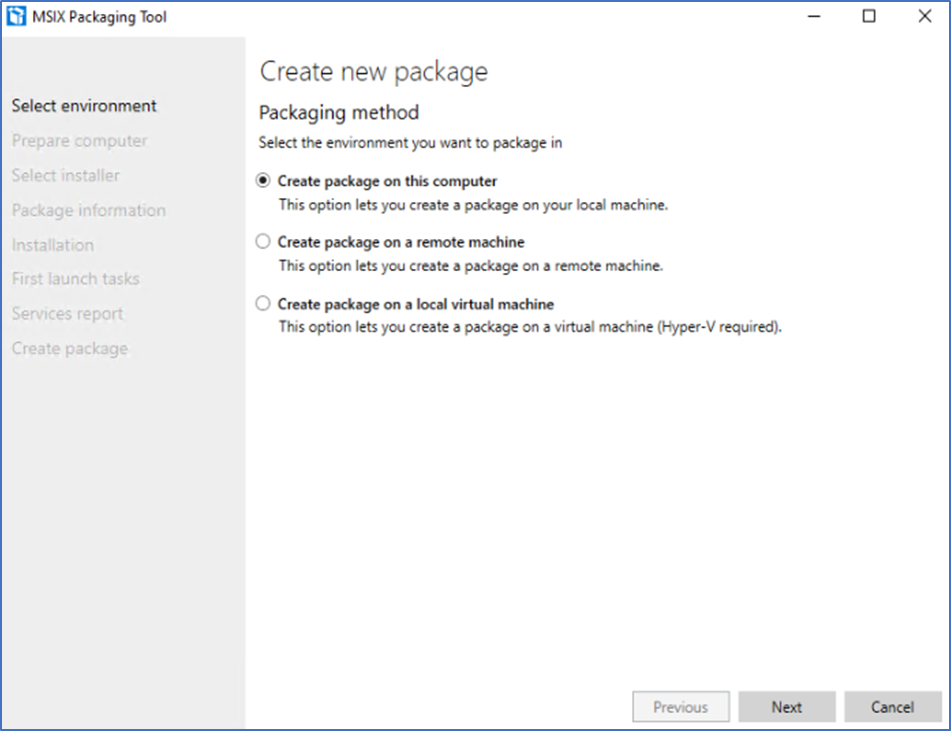
- Select Create package
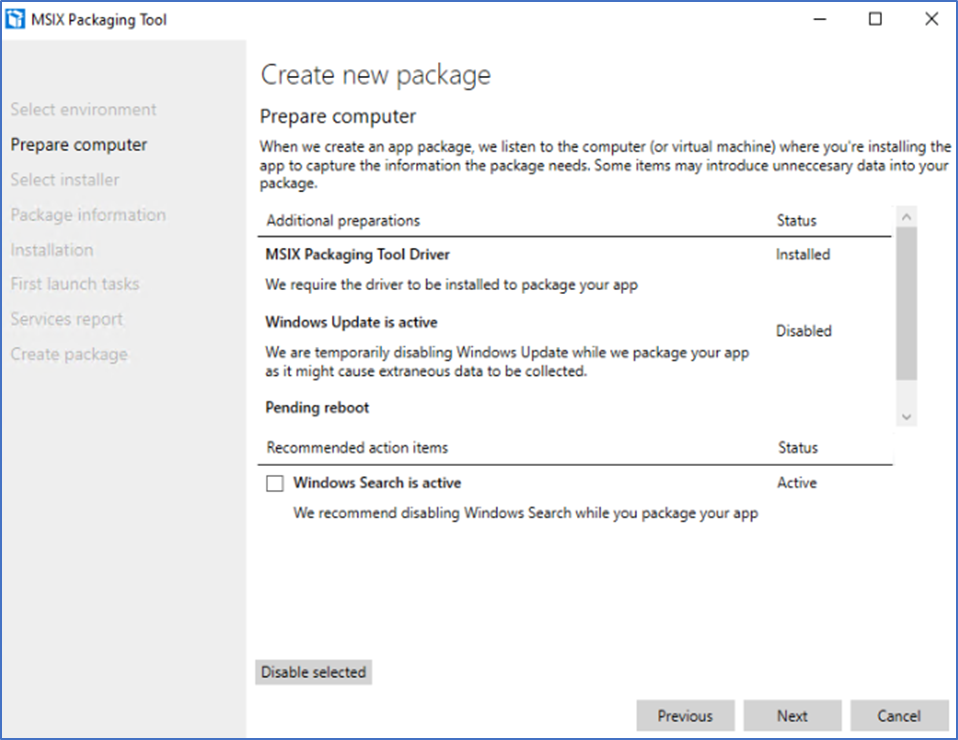
- Let prerequisites to complete
- Select the installer, and the certificate that was created earlier
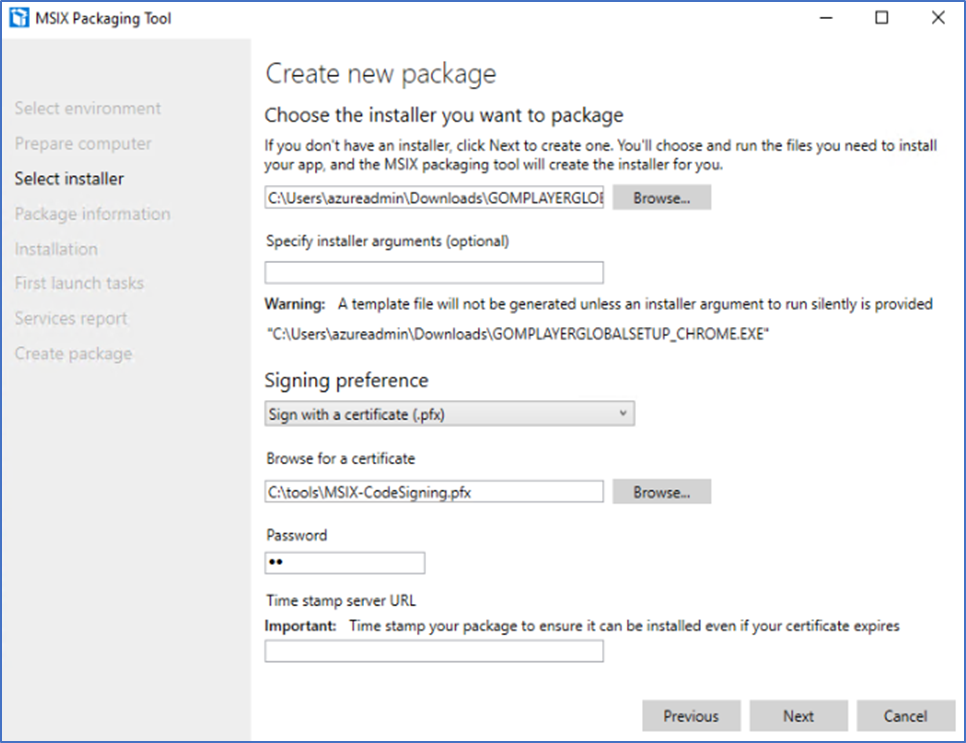
- Provide package details

- Install the applications


- Finish the capture


- Create the package


Expand MSIX to a VHD
The next step is to expand the MSIX package into a VHD. This is how we can attach the app to the AVD session using Fslogix tools.
- To create an MSIX image, you need to download the MSIXMGR tool - https://aka.ms/msixmgr.
- After downloading, unzip into a folder
- Use the following commands in CMD to create the VHD and expand the MSIX files to it.
Fill package path, Destination and VHD size
msixmgr.exe -Unpack -packagePath "C:\tools\Gomplayer.msix" -destination "C:\tools\GomPlayer.vhdx" -applyacls -create -vhdSize 1024 -filetype VHDX -rootDirectory MSIX

Configuring central storage for MSIX Applications
All MSIX images must be stored on a network share that can be accessed by users in a host pool with read-only permissions. You can use the same storage options that are available for FSLogix user profiles. In this scenario, I’m using the same azure files that I use for user profiles. If you are still not configured Azure files for user profiles, follow the below step-by-step articles.
Folder permissions are slightly different than FSlogix user profiles. Configuring correct file permissions is very important because incorrect permissions will fail the MSIX app to attach and register to the user’s session.
The following ACL permissions need to be configured on the MSIX File share
- Create two security groups in Active Directory.
Security group for AVD users
Security group for AVD Computer objects - Add all the session host VM’s to the AVD computers group and all the users to the AVD users group

- Sync both groups to Azure Active Directory
- On the Storage account, add the Storage File Data SMB Share Contributor RBAC role to both groups.
- Add Storage File Data SMB Share Elevated Contributor to all the Admins

- Next you need to grant NTFS permissions to the MSIX images folder. Provide Read & Execute permissions to the Session host ADDS group.
- You can use below command to mount the file share to copy the MSIX VHDX file to the share
net use X: \\StorageAccountName.file.core.windows.net\AzureFileShare <StorageAccessKey> /user:Azure\<StorageAcctName>


Note – Both NTFS and RBAC permissions need to be configured correctly; having incorrect permissions will cause failure to browse MSIX app from Azure portal – AVD – Hostpool – Add MSIX application. Follow the below article on domain joining Azure File share -https://www.terminalworks.com/blog/post/2020/04/20/windows-virtual-desktop-configure-fslogix-user-profiles-using-azure-files-and-active-directory-authentication
Configuring MSIX App attach from Azure portal
When configuring MSIX App attach to AVD. First, you need to add the application to the host pool. select Active on app status
Log in to the Azure AVD Portal – Select the Host Pool – MSIX packages – file location path

If you did not configure the above steps correctly, you might get an error. Make sure you have correctly configured the key steps below.
- MSIX package signed by a certificate
- Certificate installed in Session host VM’s
- MSIX image folder has ACL read rights to all Session host VM’s ADDS group
- Storage account Storage access SMB contributor RBAC role assigned to Session host VM’s group and Users Group
- Check Azure file share can be accessed from AVD VM’s
Publish the MSIX application
Next, you need to publish the MSIX application to an application group. This way, you can assign it to the required users. Custom application groups or Desktop application groups can be used. Since I want to show how this is attached to the VM, I’m using DAG.
Select the correct Application group – Applications, click Add, and select the MSIX application

Save, Assign users to the application group

Test Application Attach
Login to the AVD VM using the correct credentials
From the start menu, you can find the application is available to use

Also, from Disk Manager you can see all the attached disks with MSIX applications.

Troubleshooting
- MSIX app attached supported only on Windows 10 2004 onwards, Windows 11 and Server 2022
- MSIX app attach is not supported when your VM’s are Azure AD joined
- Another common issue is Certificate is not installed in the session hosts, and the certificate is expired
- Also, when NTFS permissions on the share are not correctly configured, MSIX fails to attach.
I hope this post is useful


